
Tutoring Services Across
Canada and the US
Canada and the US

Log in to your teacher account.
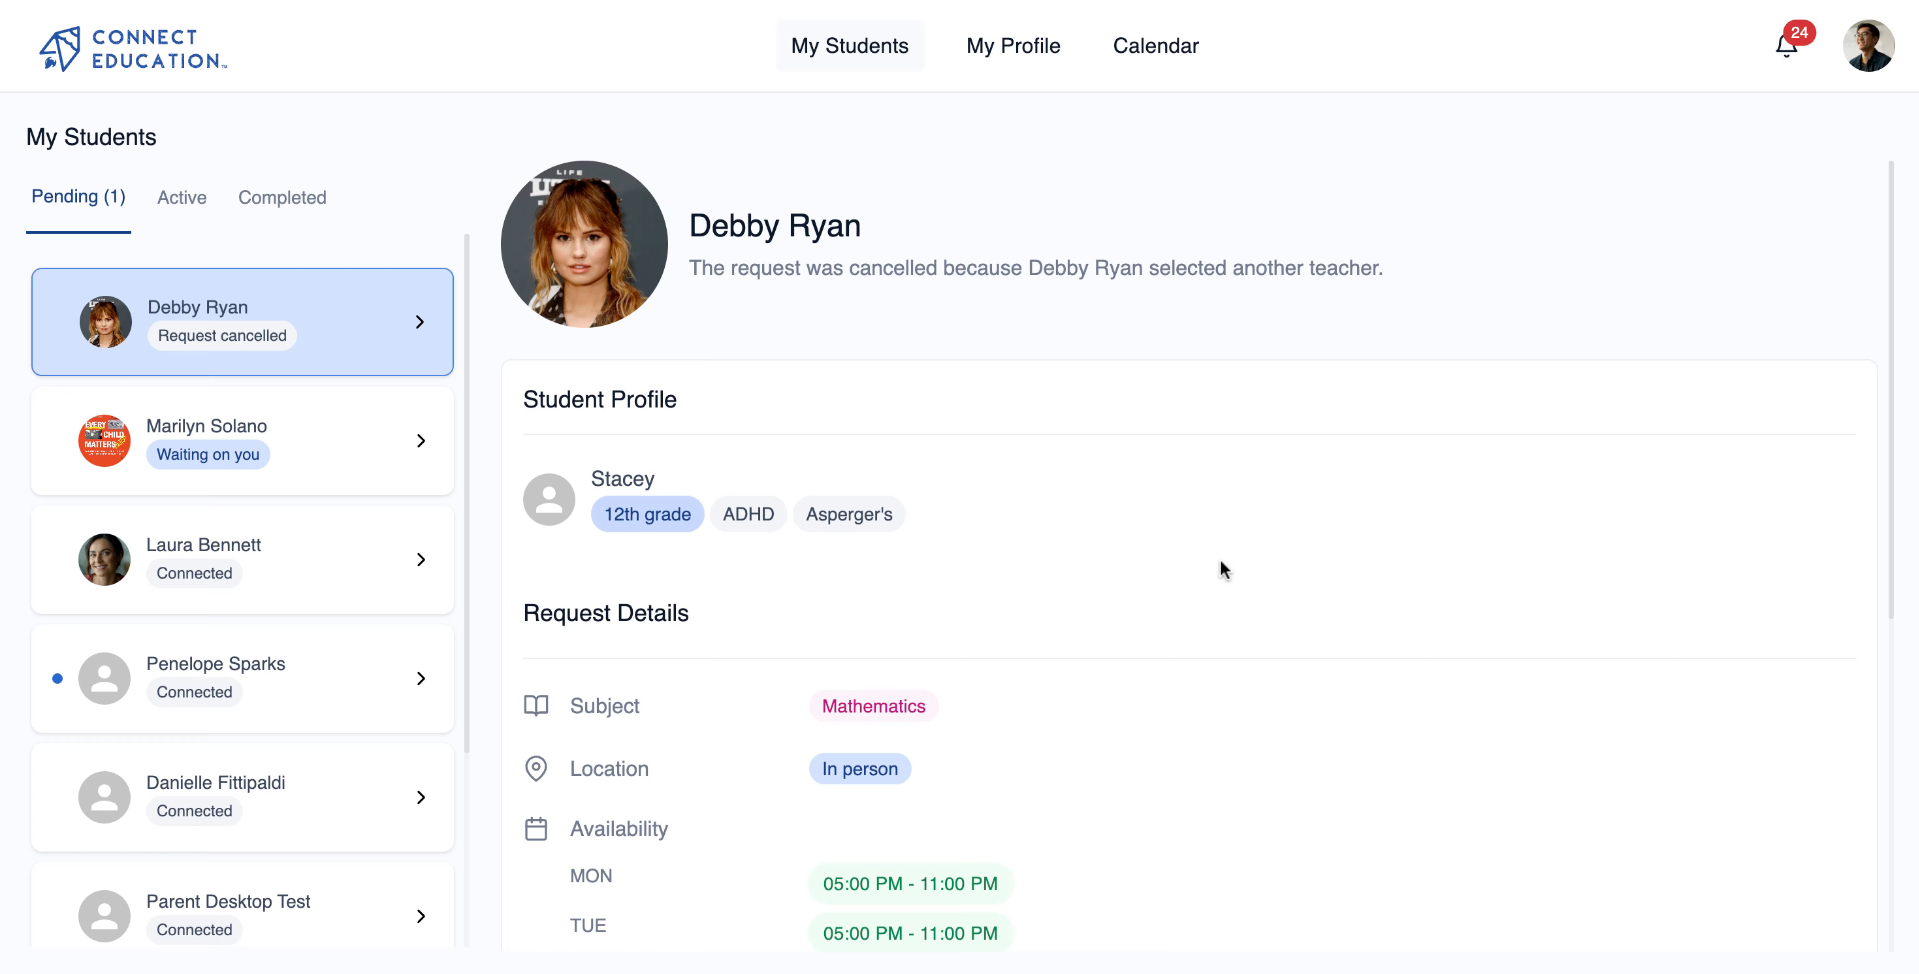
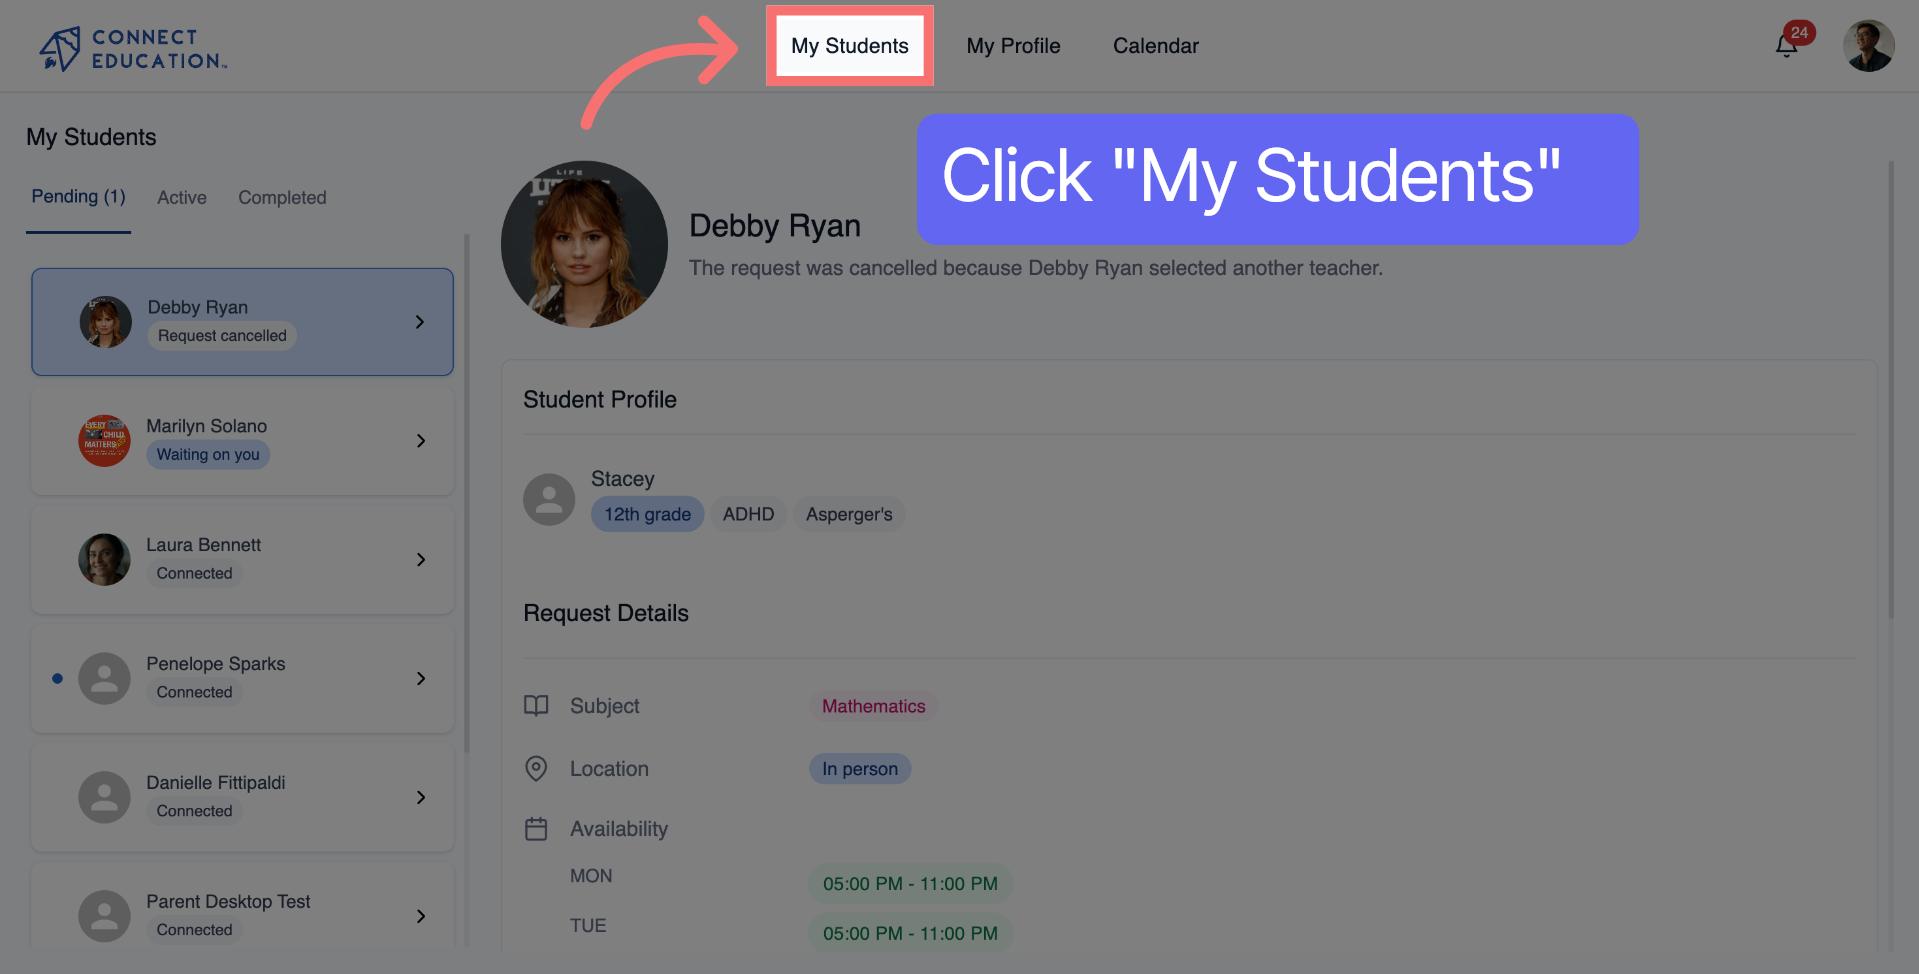
Access the My Students section to view all your current students and manage their lesson schedules.
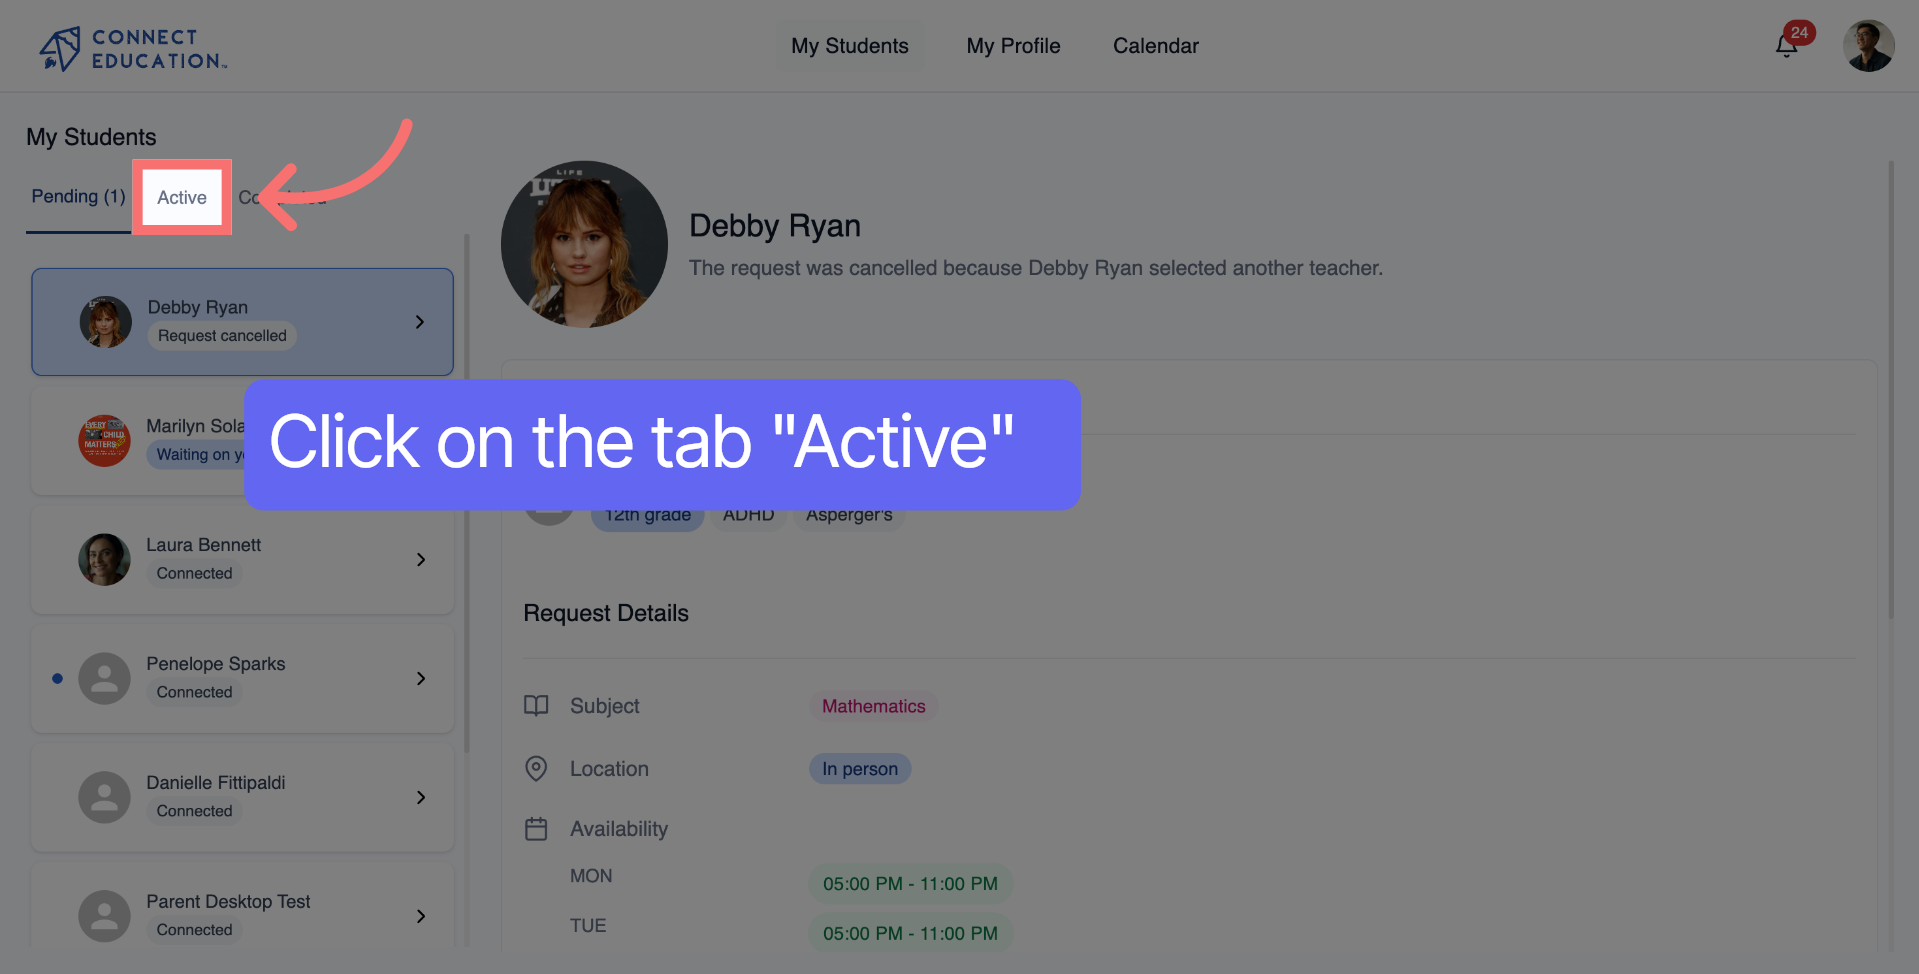
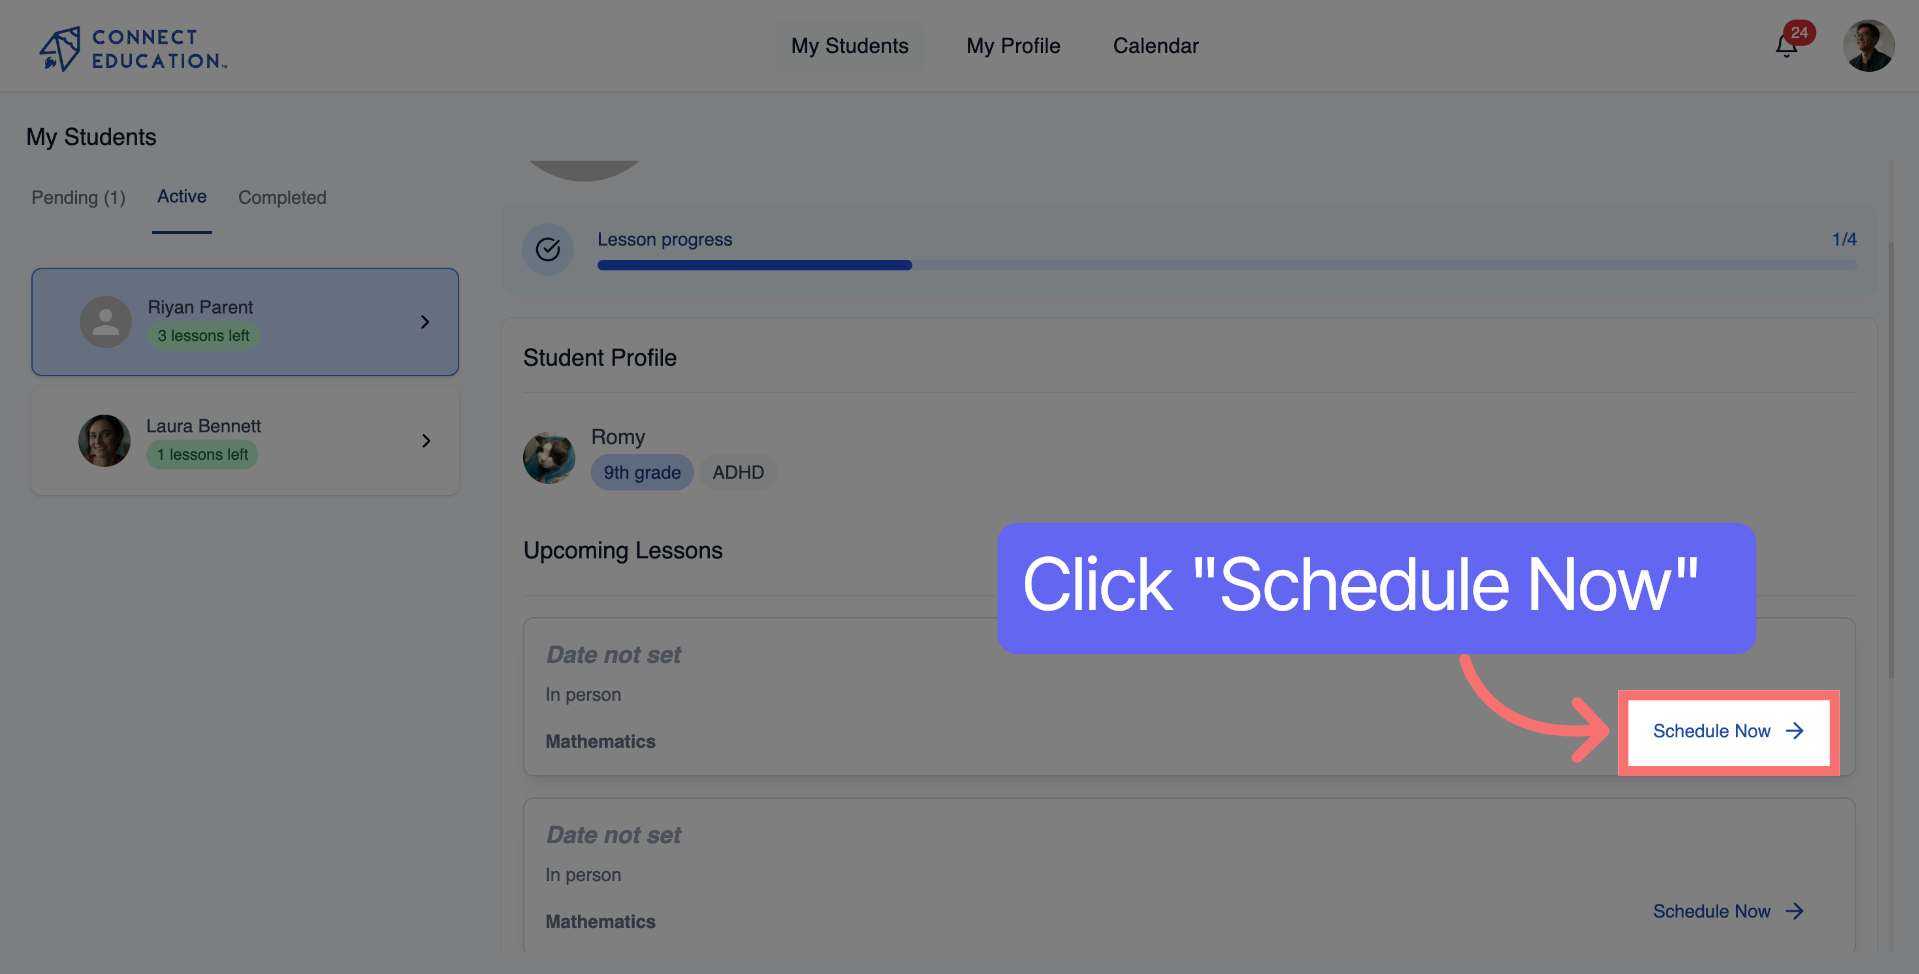
Click the Active tab to find students who currently have ongoing lessons.
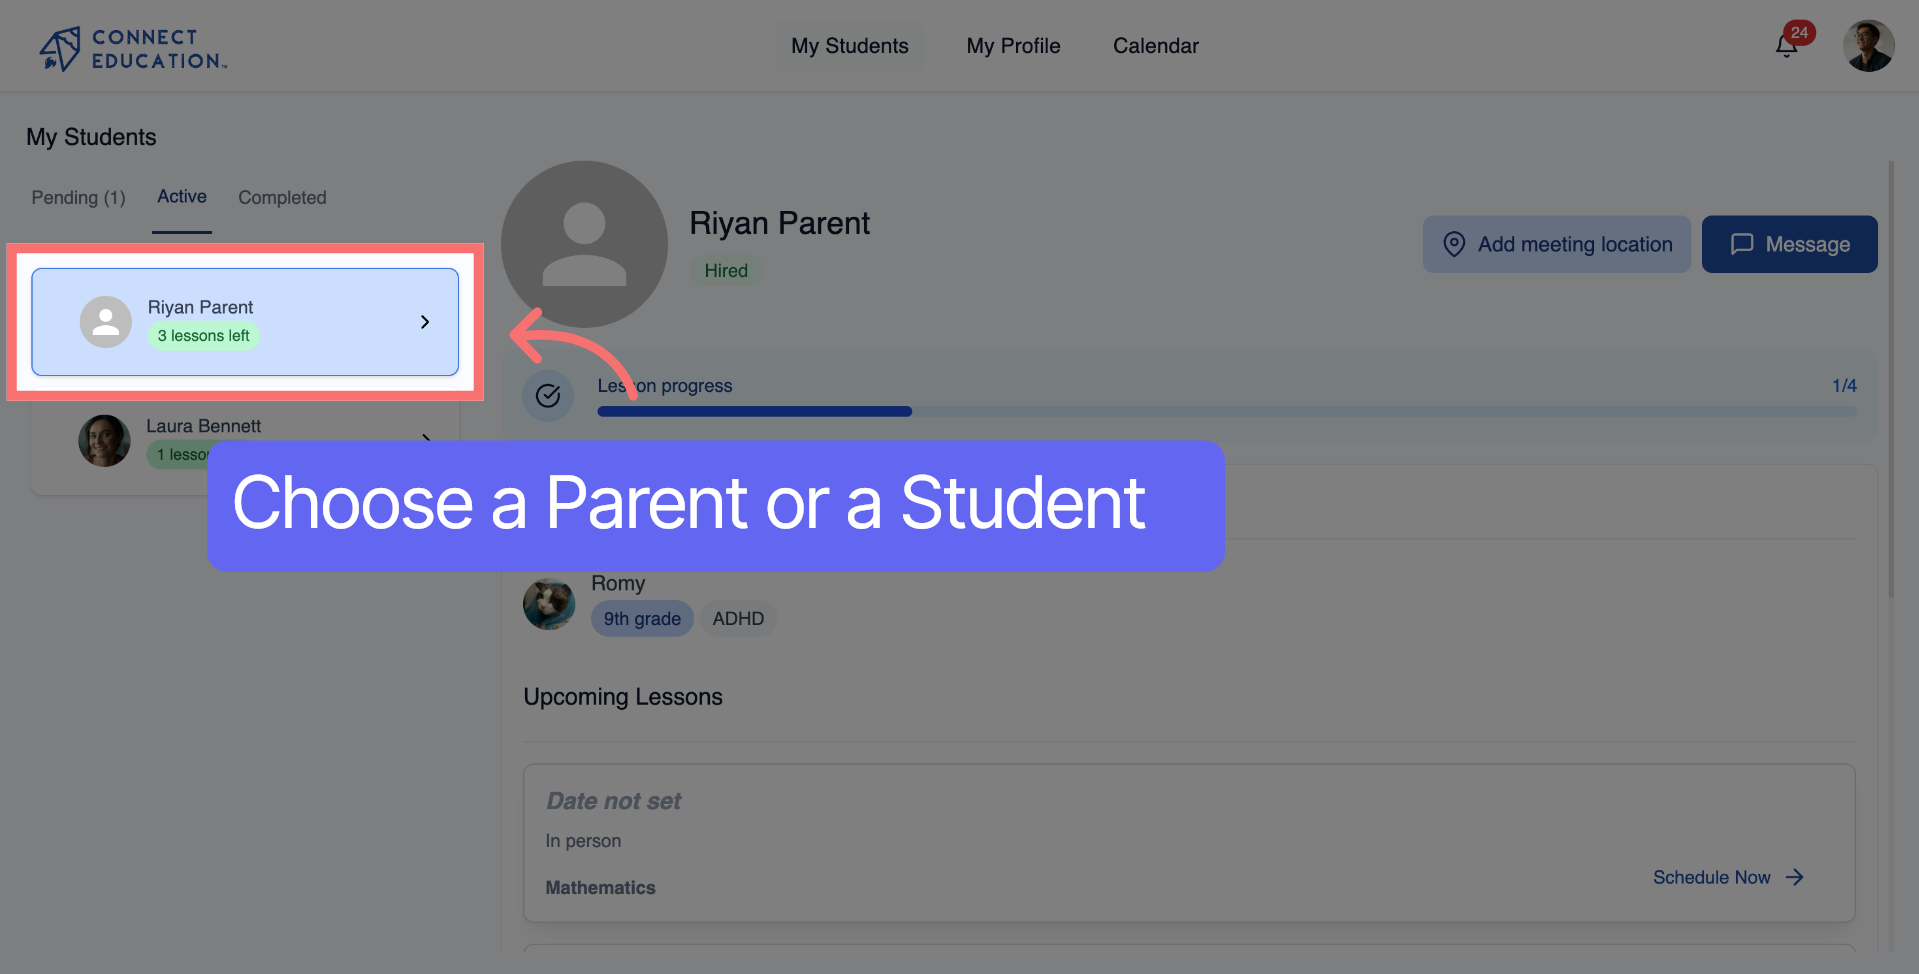
Select the student with remaining lessons to view detailed information about their lesson status and options.
Click "Schedule Now" to begin setting up lesson times for the selected student.
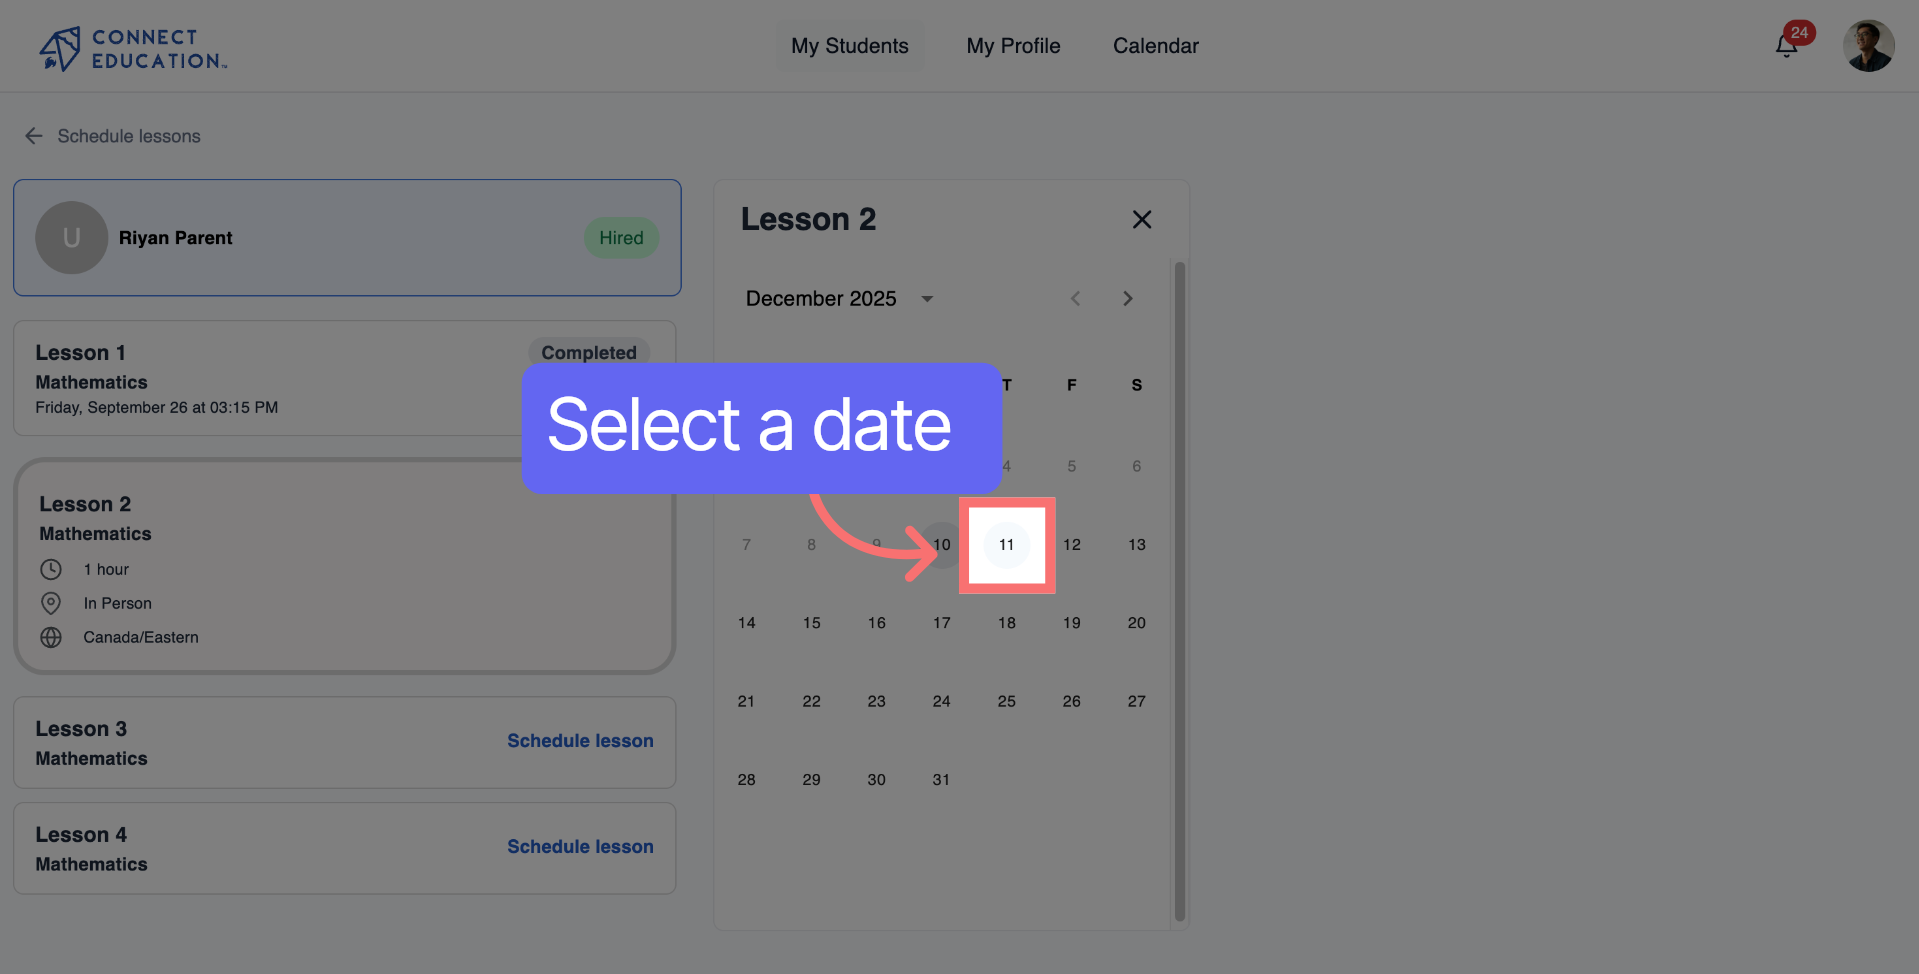
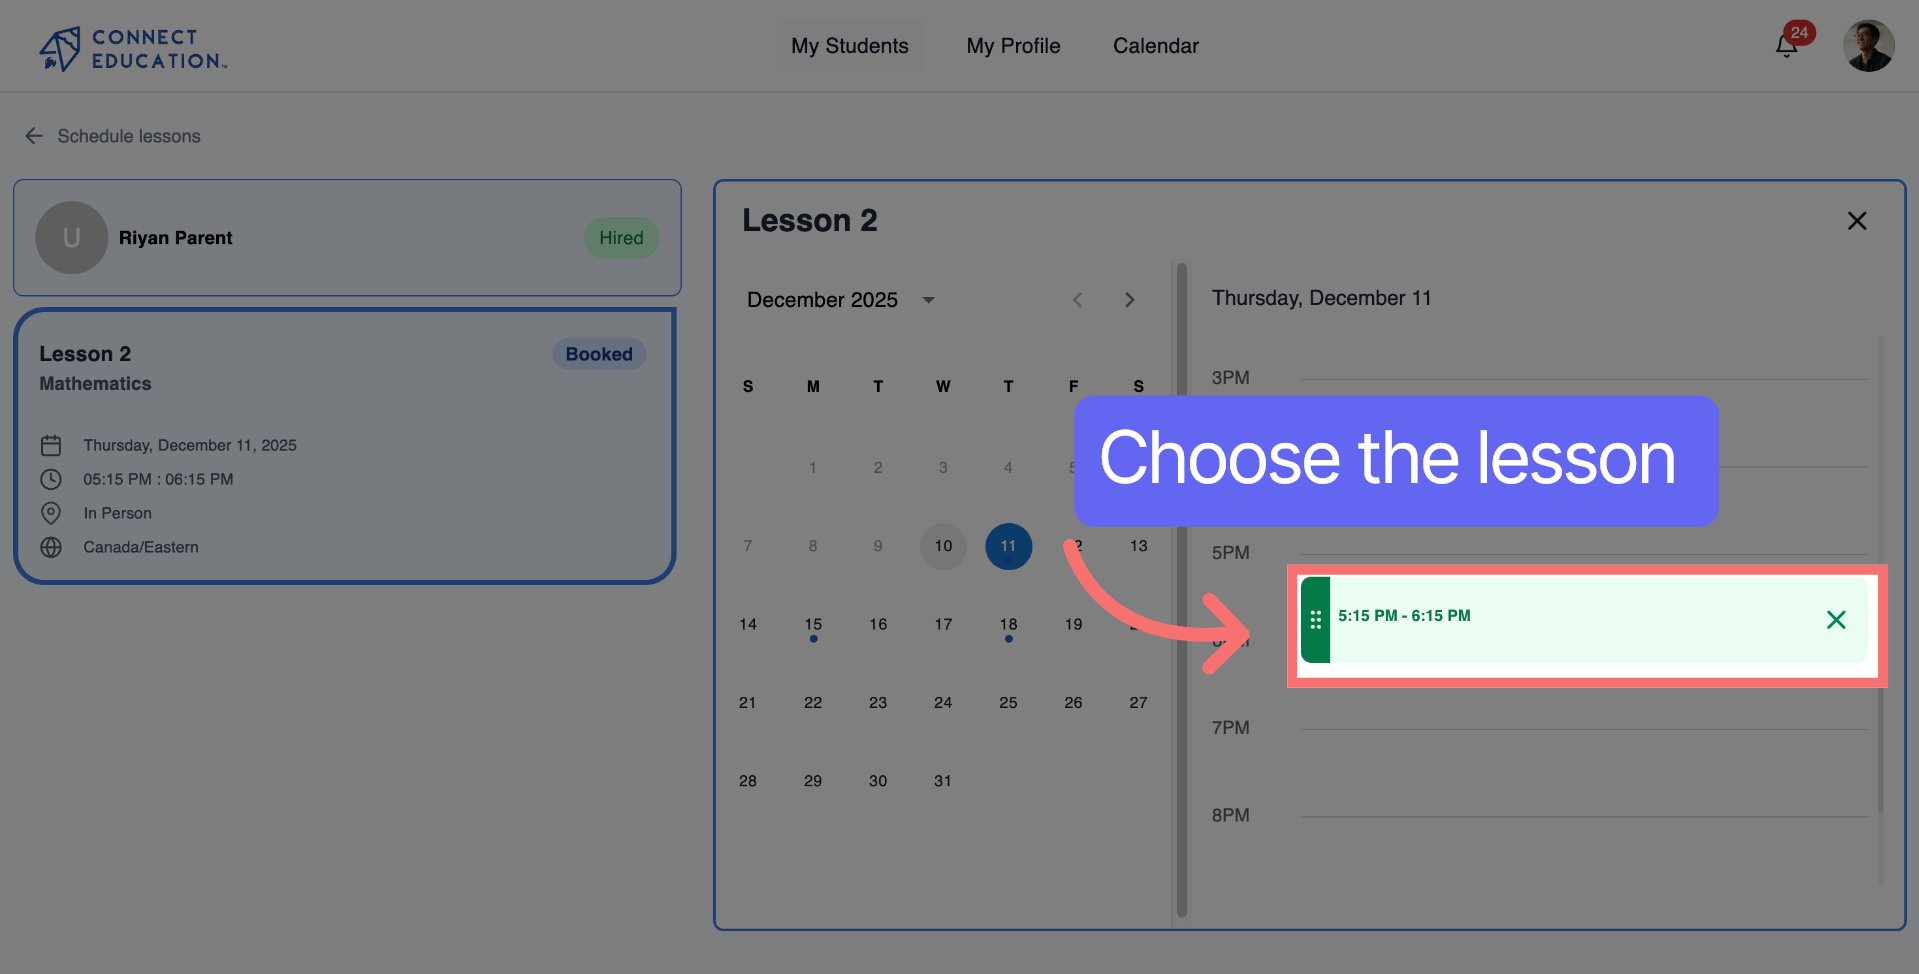
Select a date to schedule the lesson on that specific day.
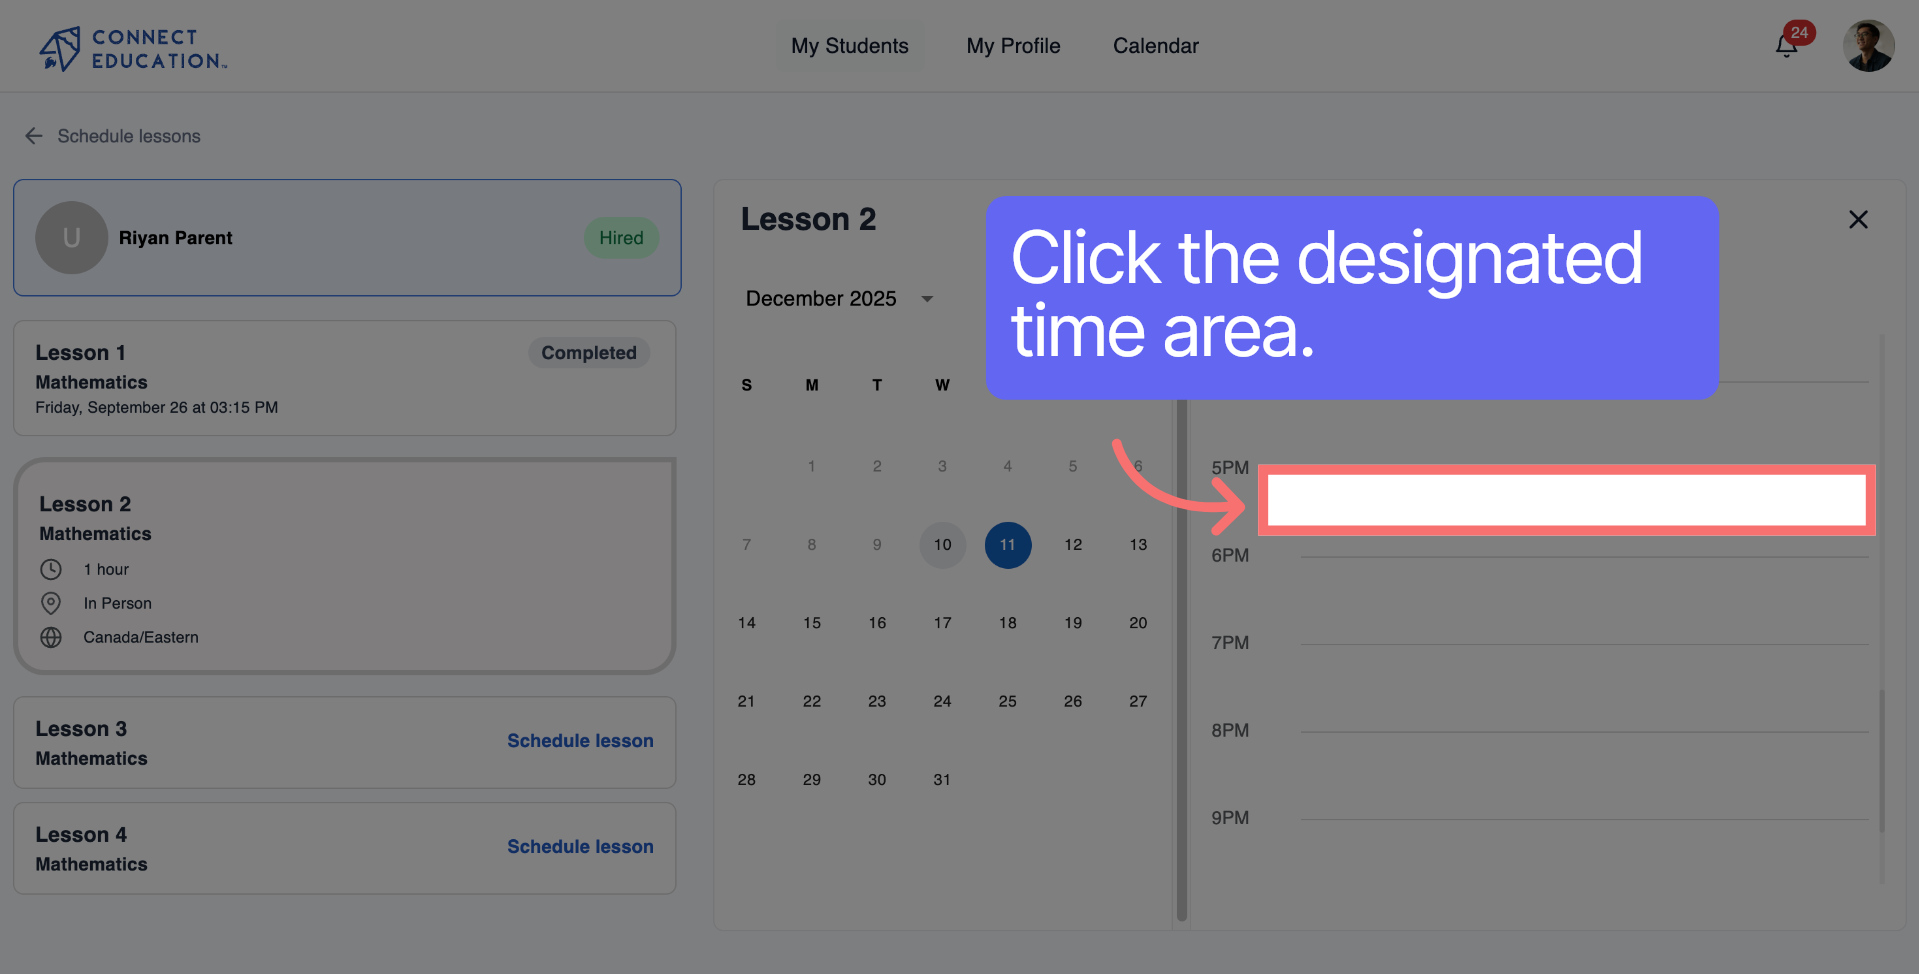
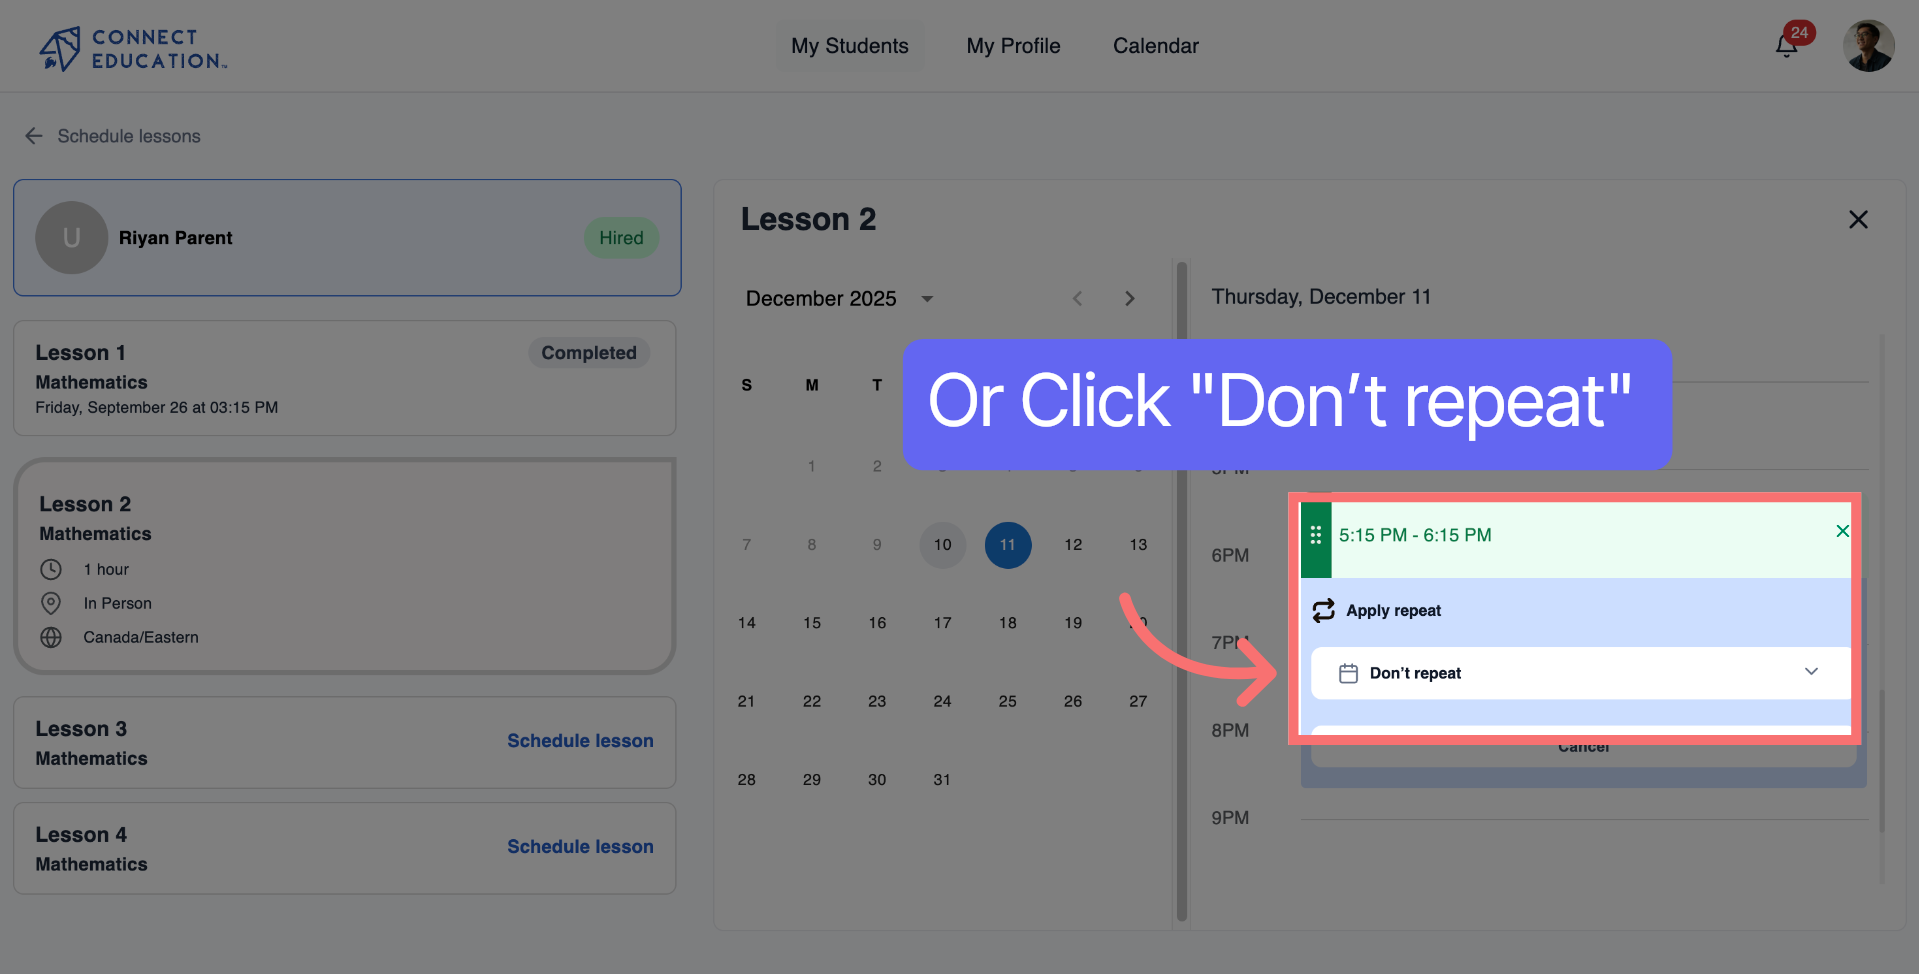
Click the indicated area to open more scheduling settings and customize lesson recurrence.
Select "Repeat for all lessons" to apply the chosen schedule across all remaining sessions for consistency.
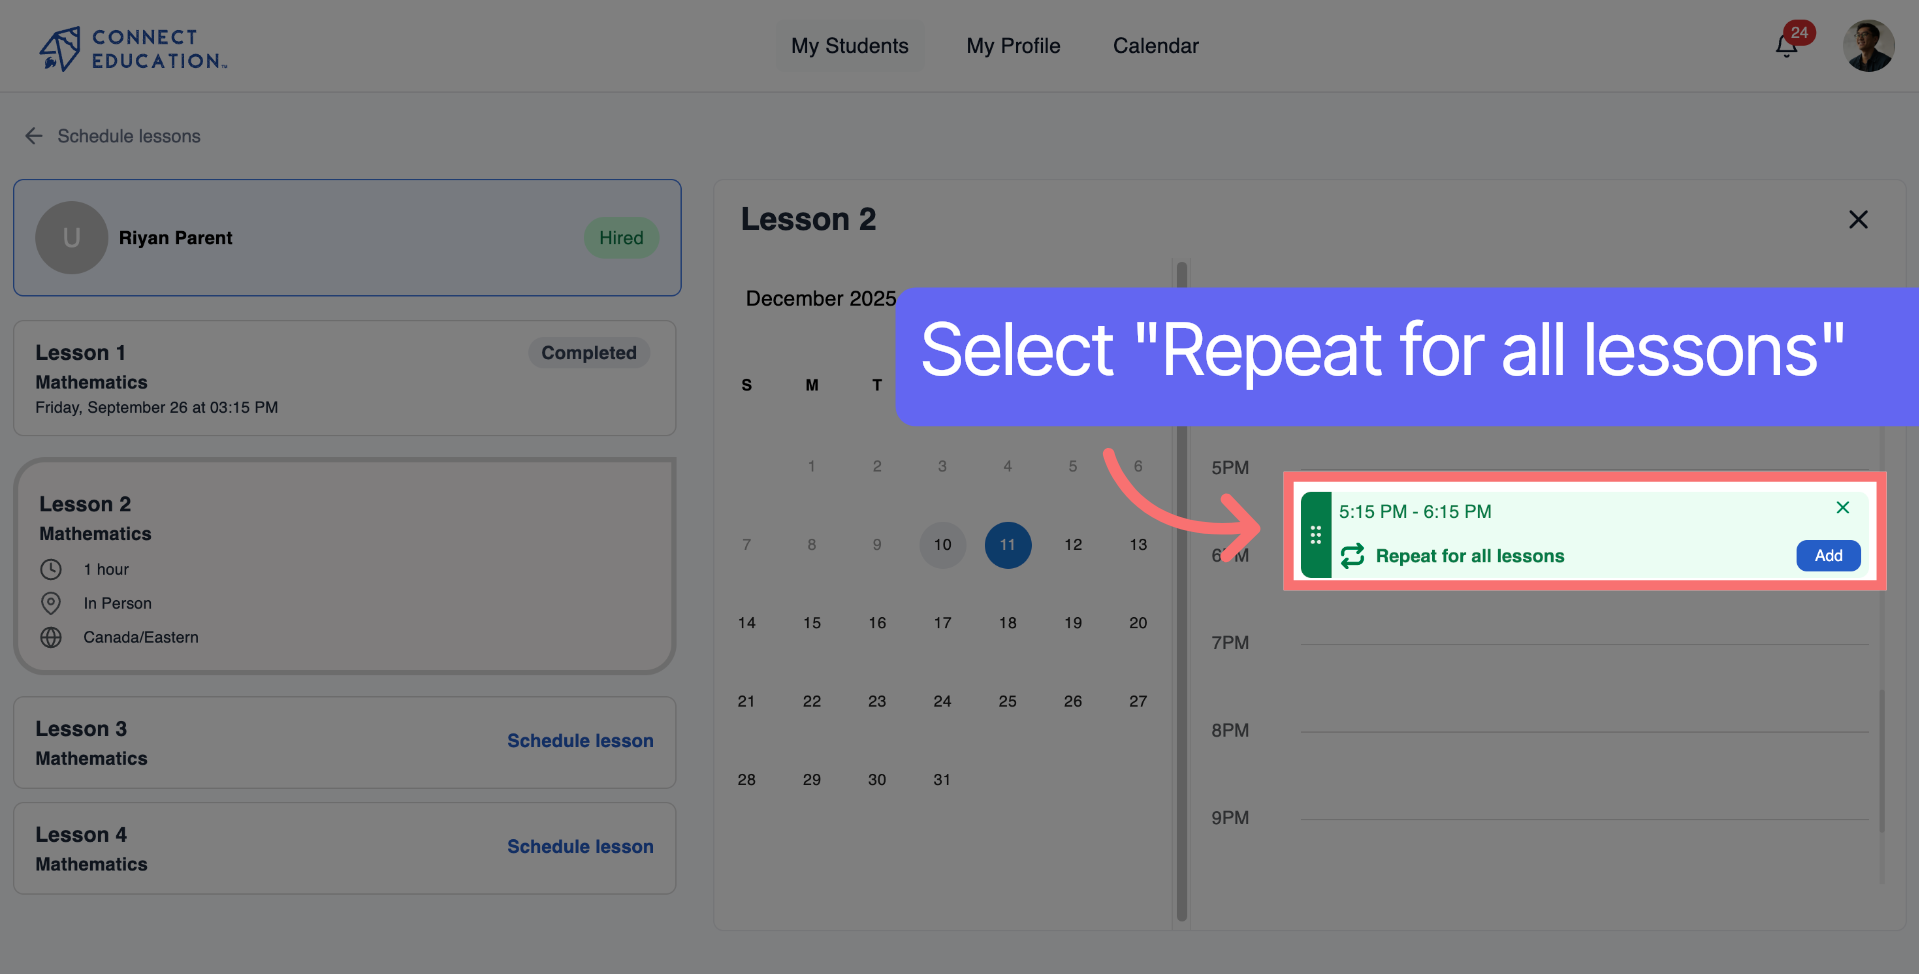
Click "Don’t repeat" if you prefer to schedule lessons individually without automatic recurrence.
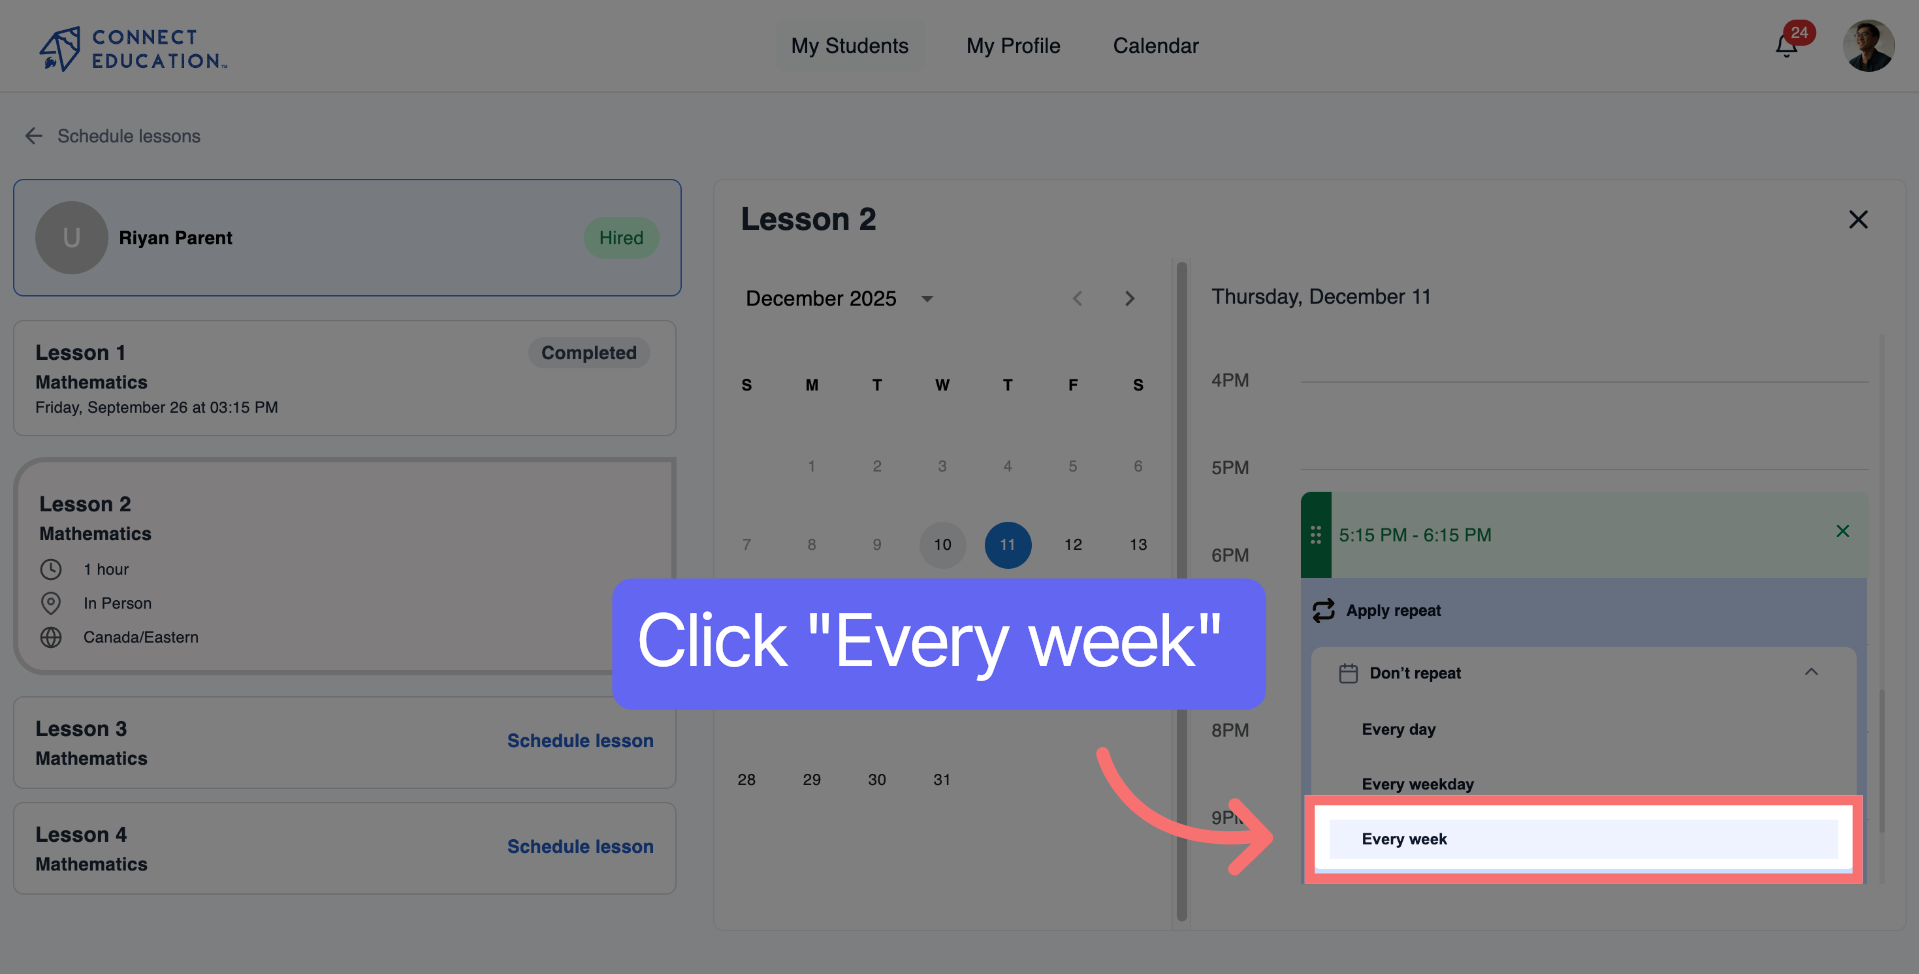
Choose "Every week" to schedule lessons on a weekly basis, ensuring regular sessions.
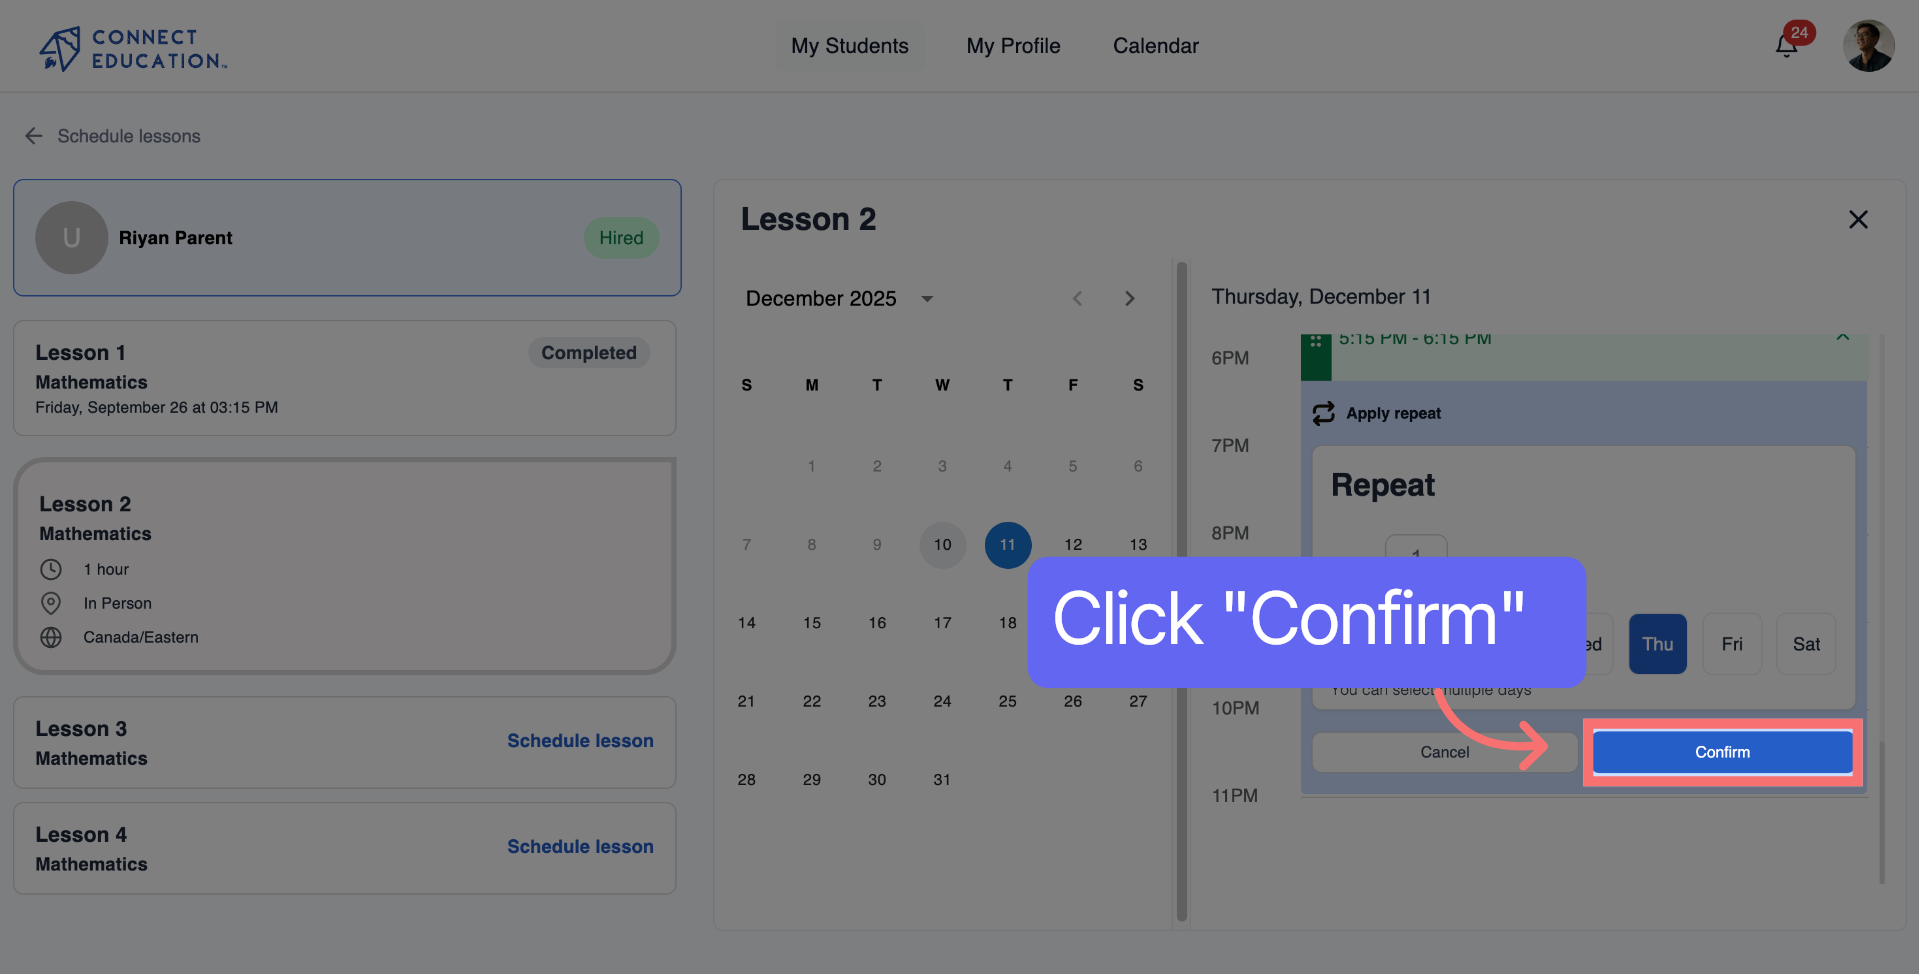
Click a day again to confirm the selection of the day for the lesson schedule.

Click Confirm to save your scheduling selections and finalize the lesson setup.
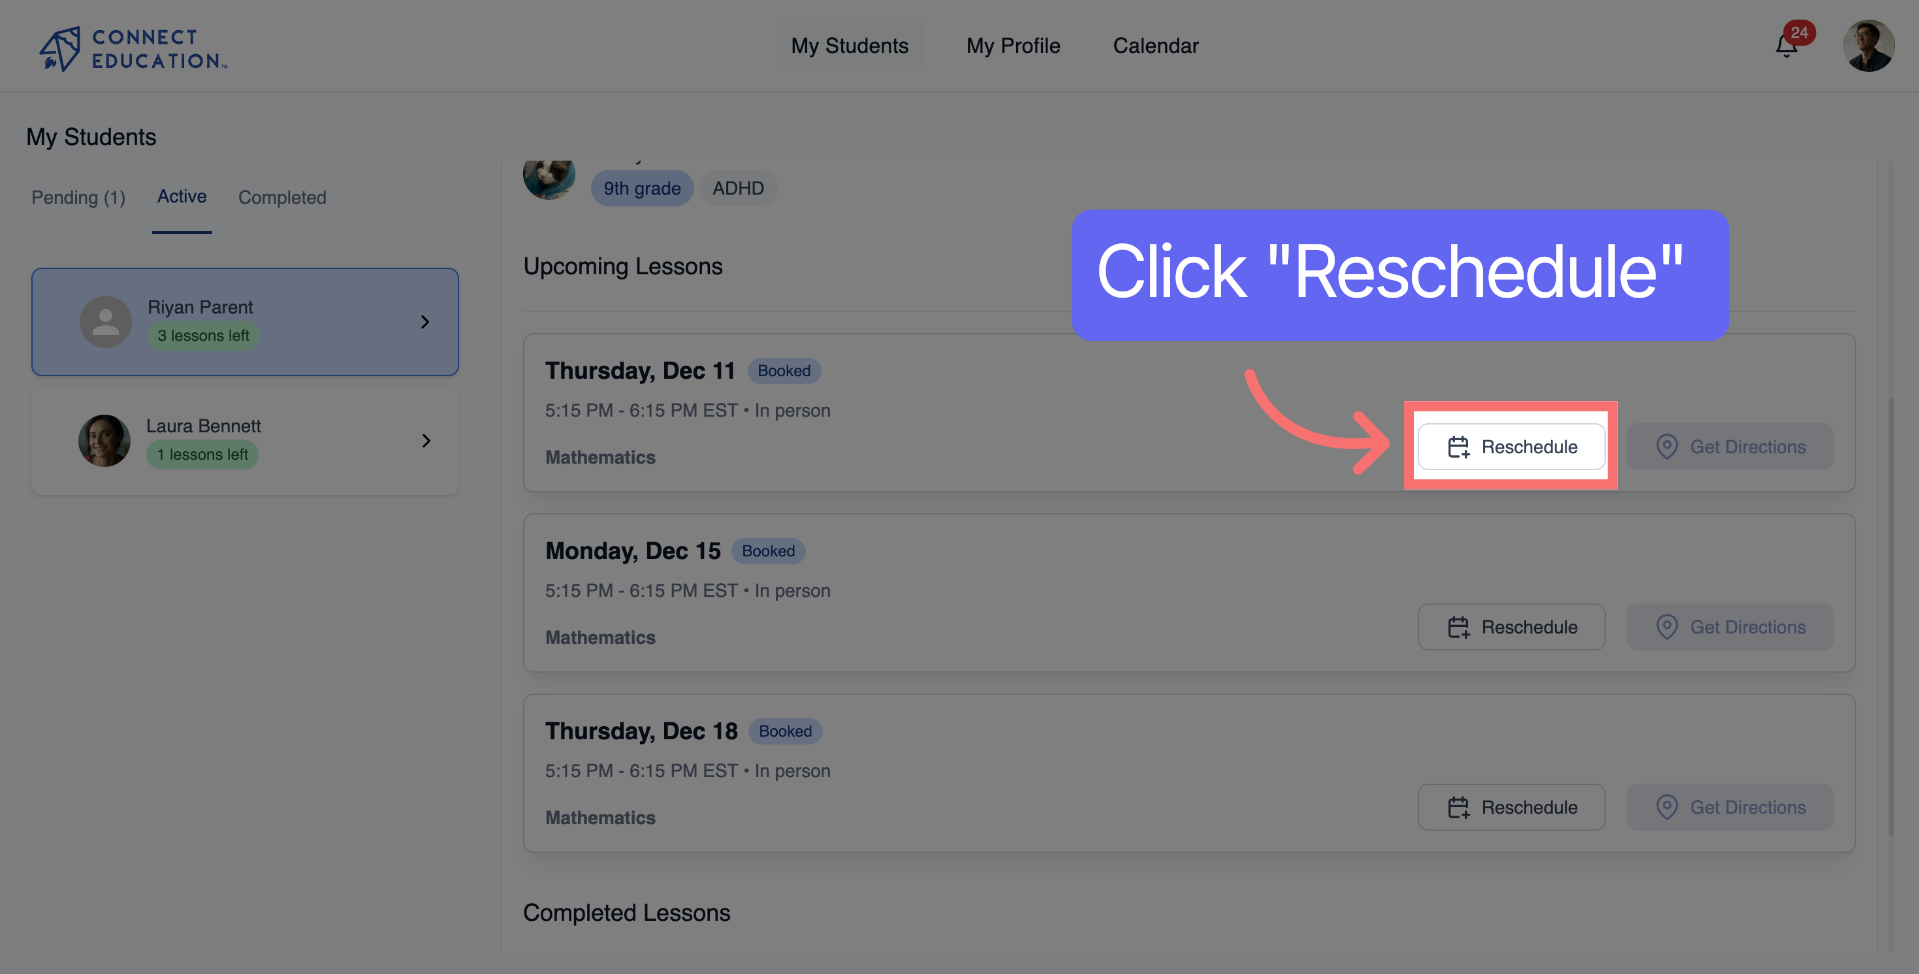
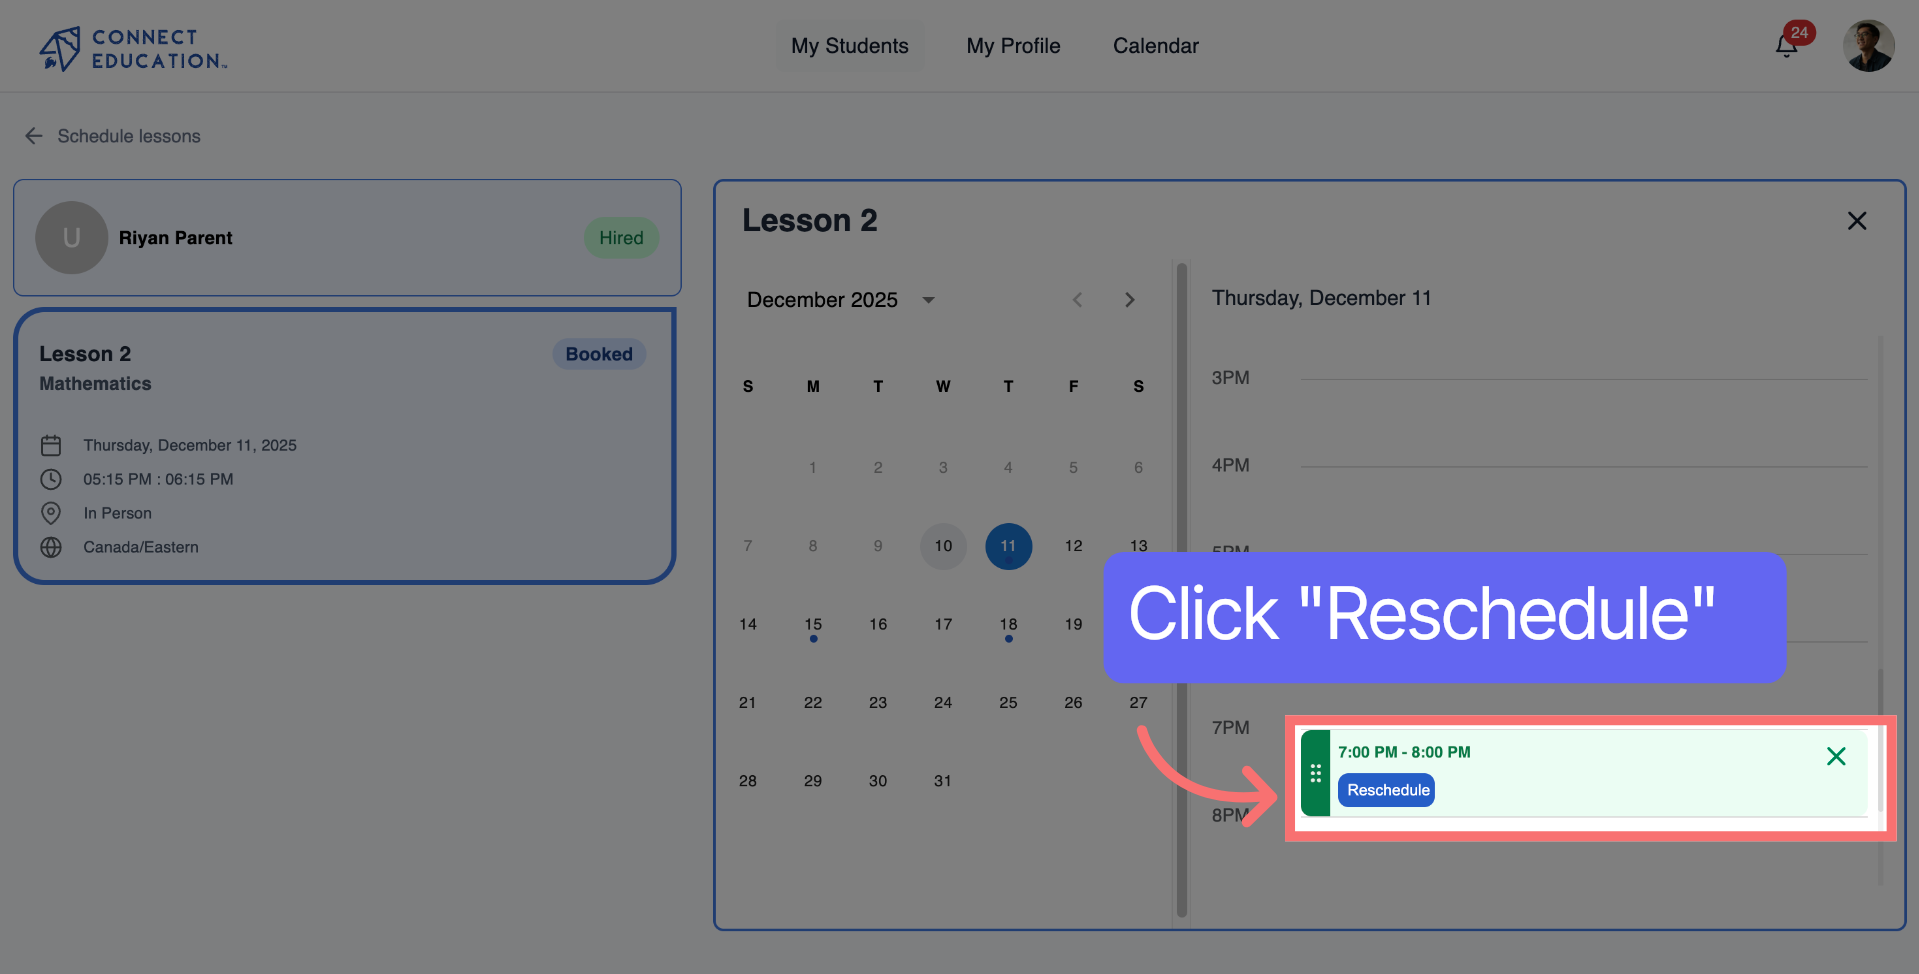
Click "Reschedule" to begin changing the date or time of a previously scheduled lesson.
Click the indicated area to view and adjust specific details related to the lesson rescheduling.
Click "Reschedule" to apply the changes and update the lesson schedule accordingly.
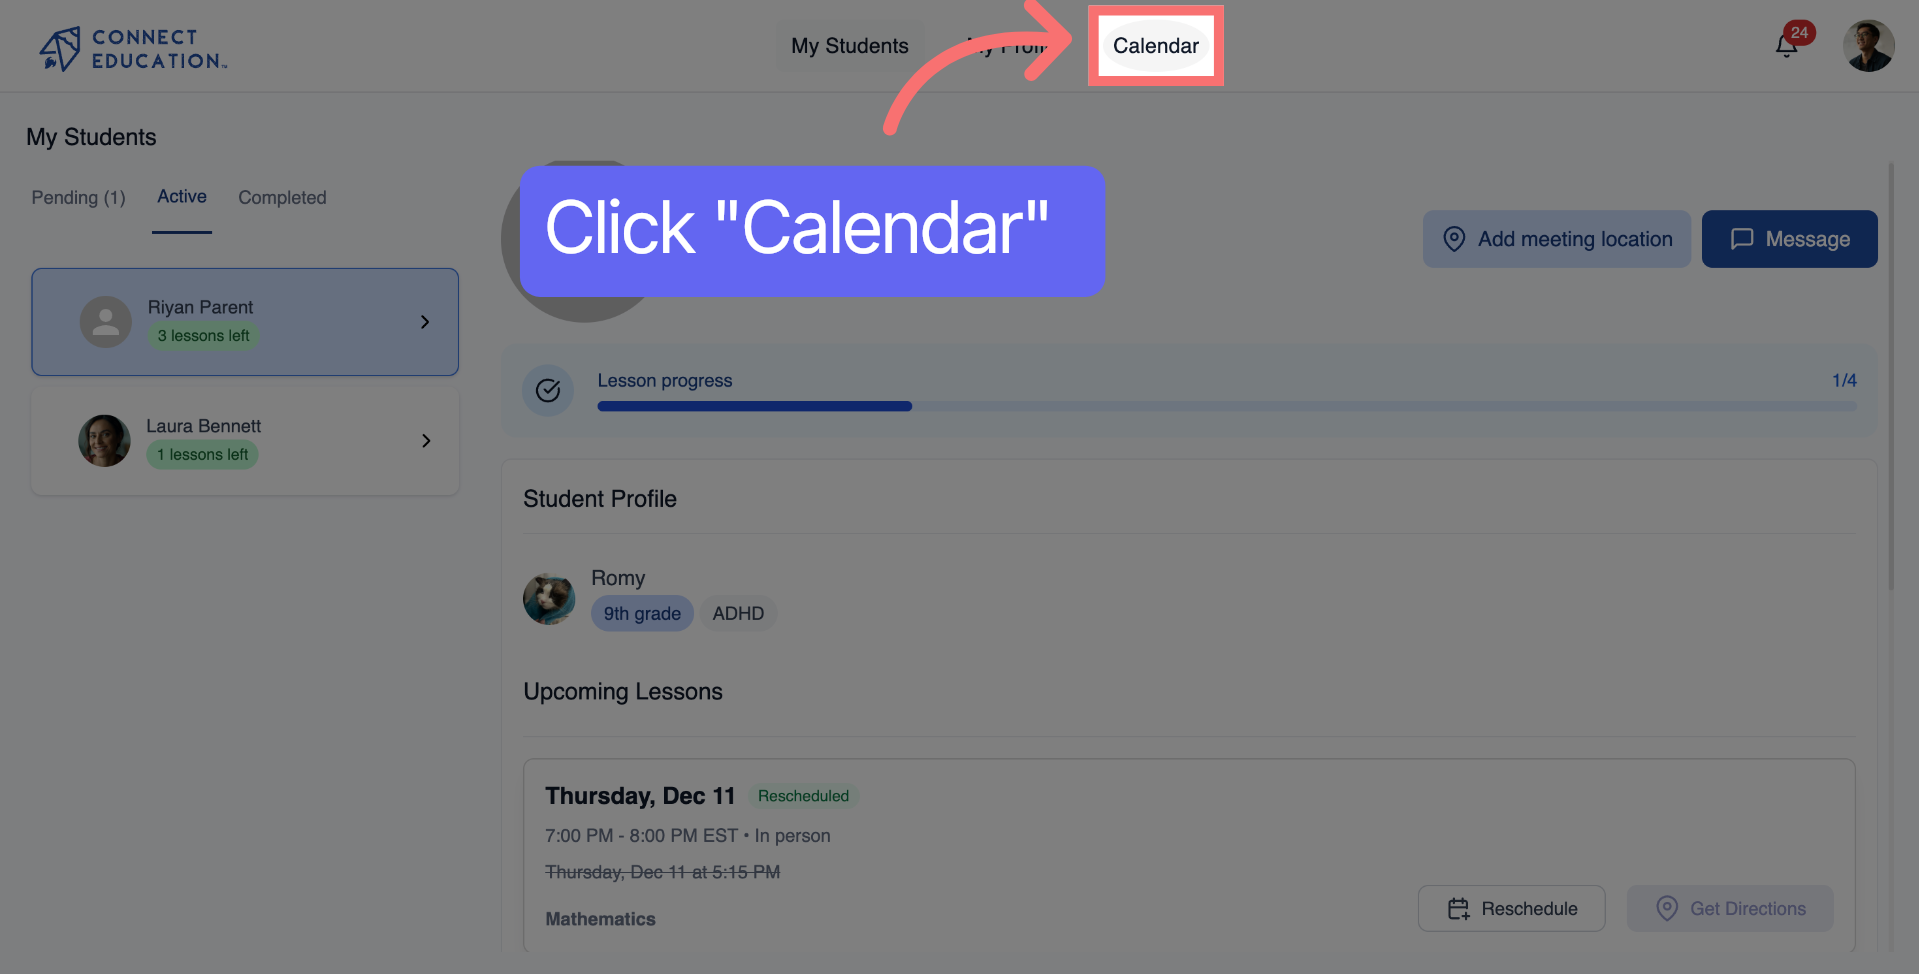
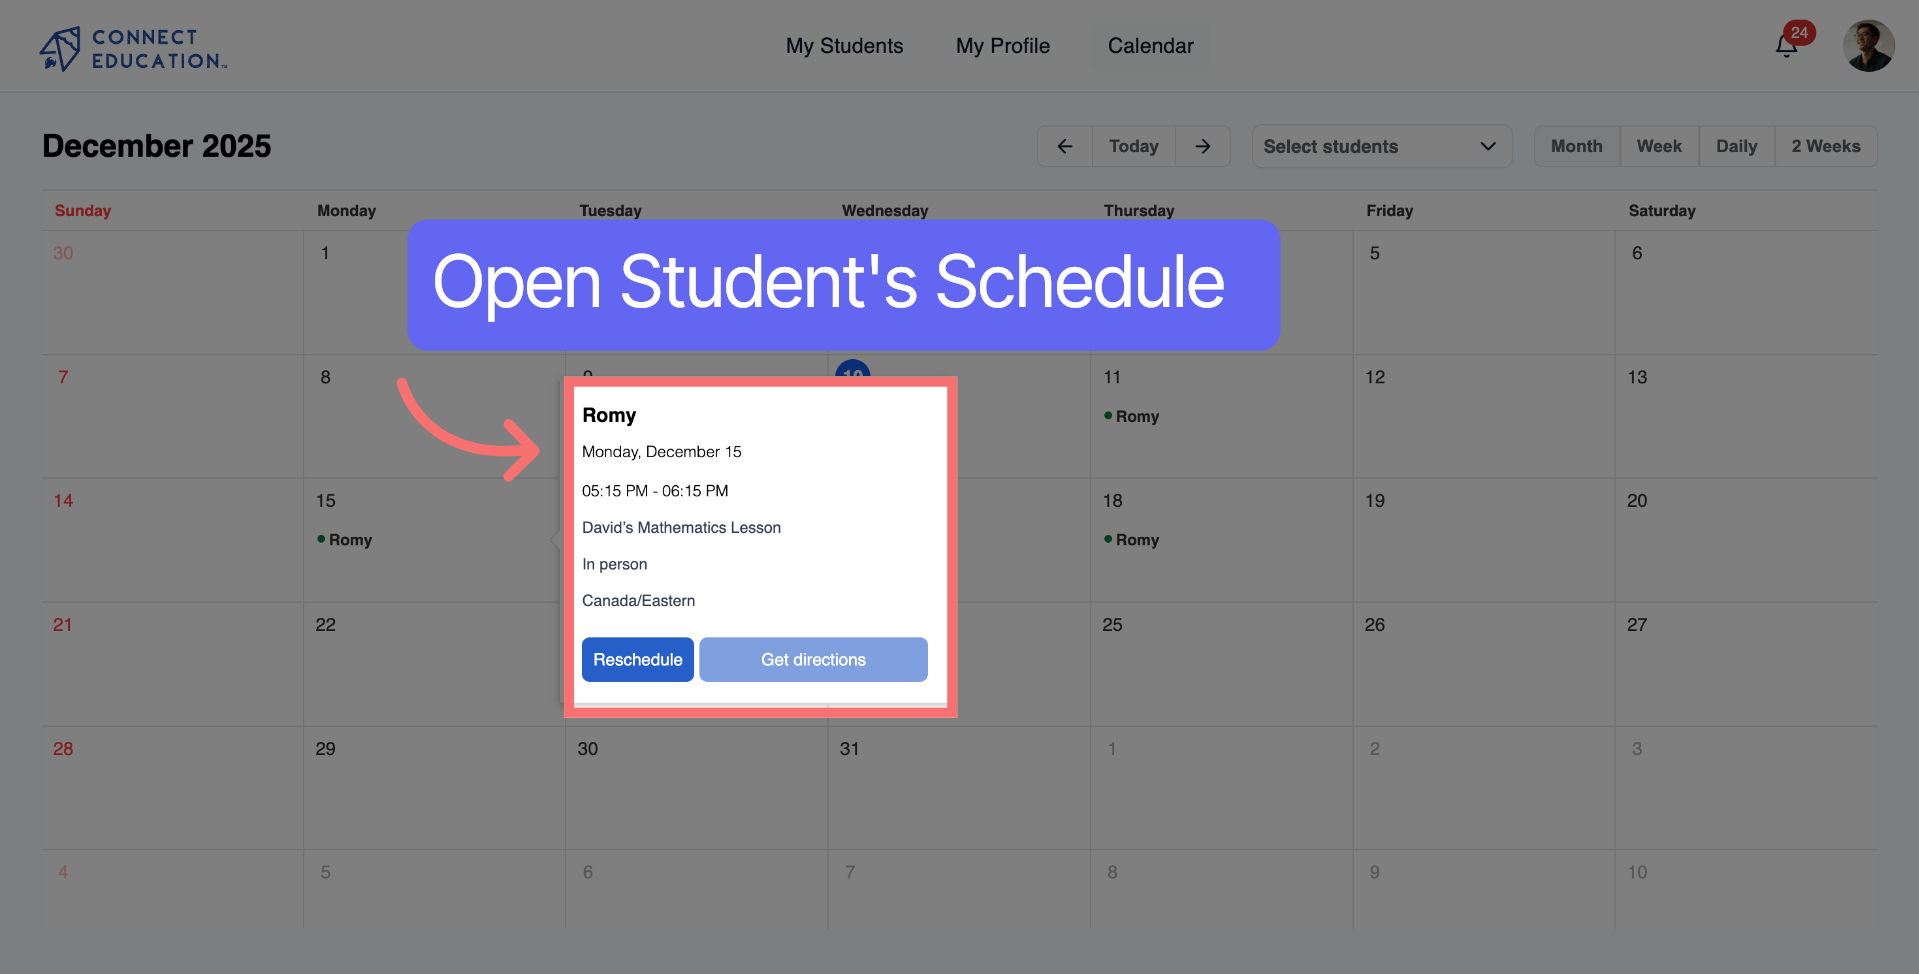
Click Calendar to open the calendar view, where you can see all scheduled lessons.
Click on a student's name to view their profile and lesson schedule.
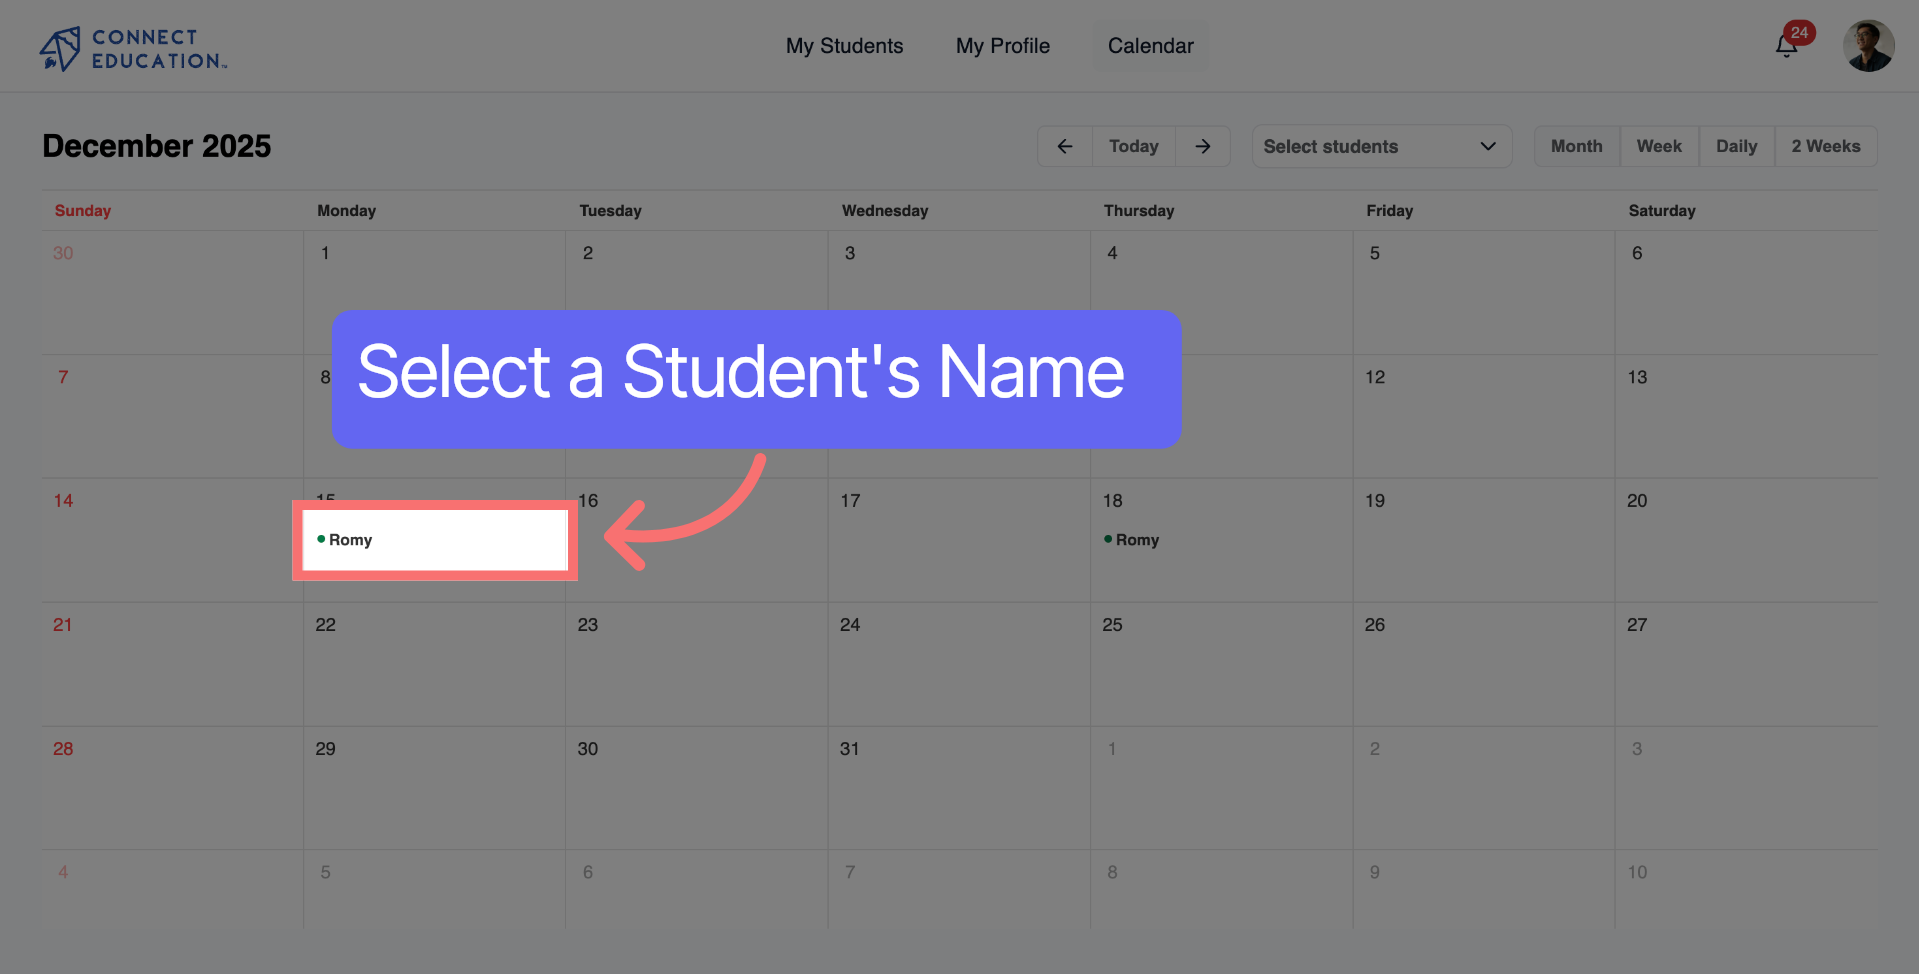
Click a student's name again to view detailed scheduling information for this student.
Lesson not saving?
Double-check that all required fields (date, time, subject) are filled before hitting "Save".
Scheduling regular sessions?
Try to book multiple lessons in advance to help families plan ahead and increase consistency.